Uploading
Uploading files into ResourceSpace is a straightforward process. During upload, you'll add the metadata that enables others to find, understand, and use your resources effectively. Providing clear and detailed metadata at this stage is extremely important, as it directly affects how easily your contributions can be discovered, searched, and re-used by other users.
Upload sequence
There are two primary ways of uploading files into ResourceSpace:
- Setting the metadata first, then uploading the files
- Uploading first, then setting the metadata for each resource
There'll be a system-wide default upload sequence set, but you can switch to the method you'd like to use at any time in your account preferences.
Setting metadata first, then uploading
1. Navigate to 'Upload'
The upload page will be accessed differently depending on your user permissions and system configuration. For users who upload straight into the 'Active' state (typically Administrators) there'll usually be a single 'Upload' button at the top right of the screen. For users who upload into a pending state, there'll be a 'Contributions' link in the page header. If you don't have either of these options, it's likely that you're unable to upload to ResourceSpace. Check in with your administrator if you're unable to upload via one of the below methods.
- If you have an 'Upload' button, just click on this to start uploading
- If You have a 'Contributions' link, click this and then select 'Upload resources' to get to the upload page
.png)
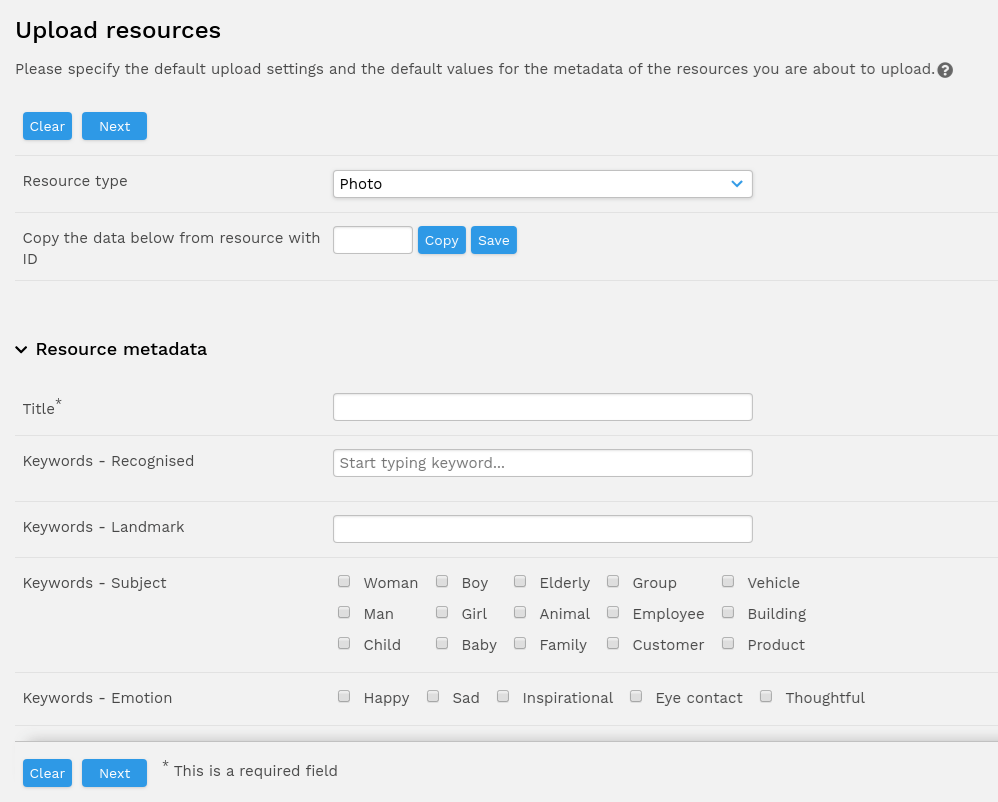
2. Add metadata to uploads
Before uploading files, add metadata to describe your resources. To keep the information accurate and useful, you may need to upload files individually or in small groups. Completing as many metadata fields as possible will make your resources easier to find, understand, and re-use.
Make sure you've selected the correct resource type from the drop-down menu at the top of the upload form before entering any metadata. Some fields are only shown for specific resource types.
Helpful guidance may appear when you click into a field, suggesting the type of information to enter.
Fields marked with a * are required and must be completed before you can upload your resources.
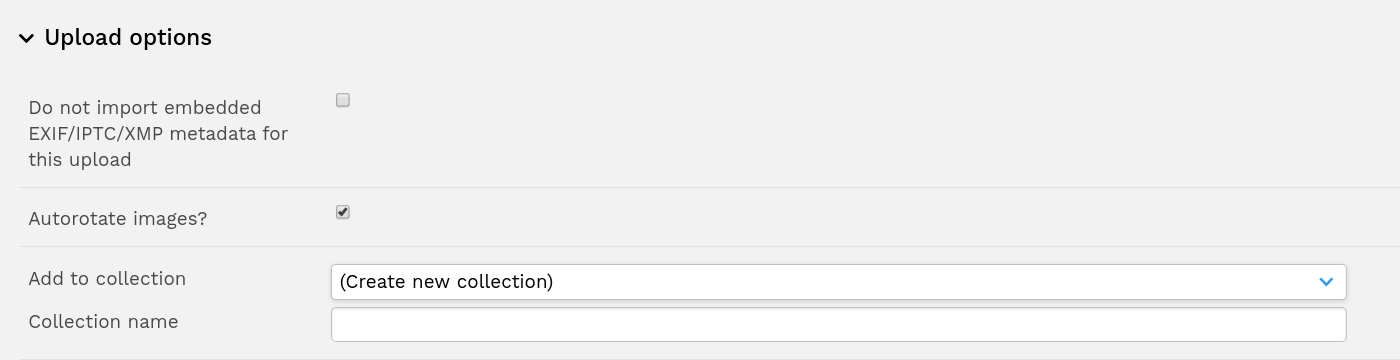
The upload options section provides additional controls, such as choosing which collection to upload into, or linking related resources together. Additional options may also be available depending on your system setup.
It is under upload options that you will also choose whether to import embedded metadata with the resources. This uses Exiftool, a third party tool that's described in more detail here.
You may also need to select a Status and Access level for your resource. See Resource status & access for more information.
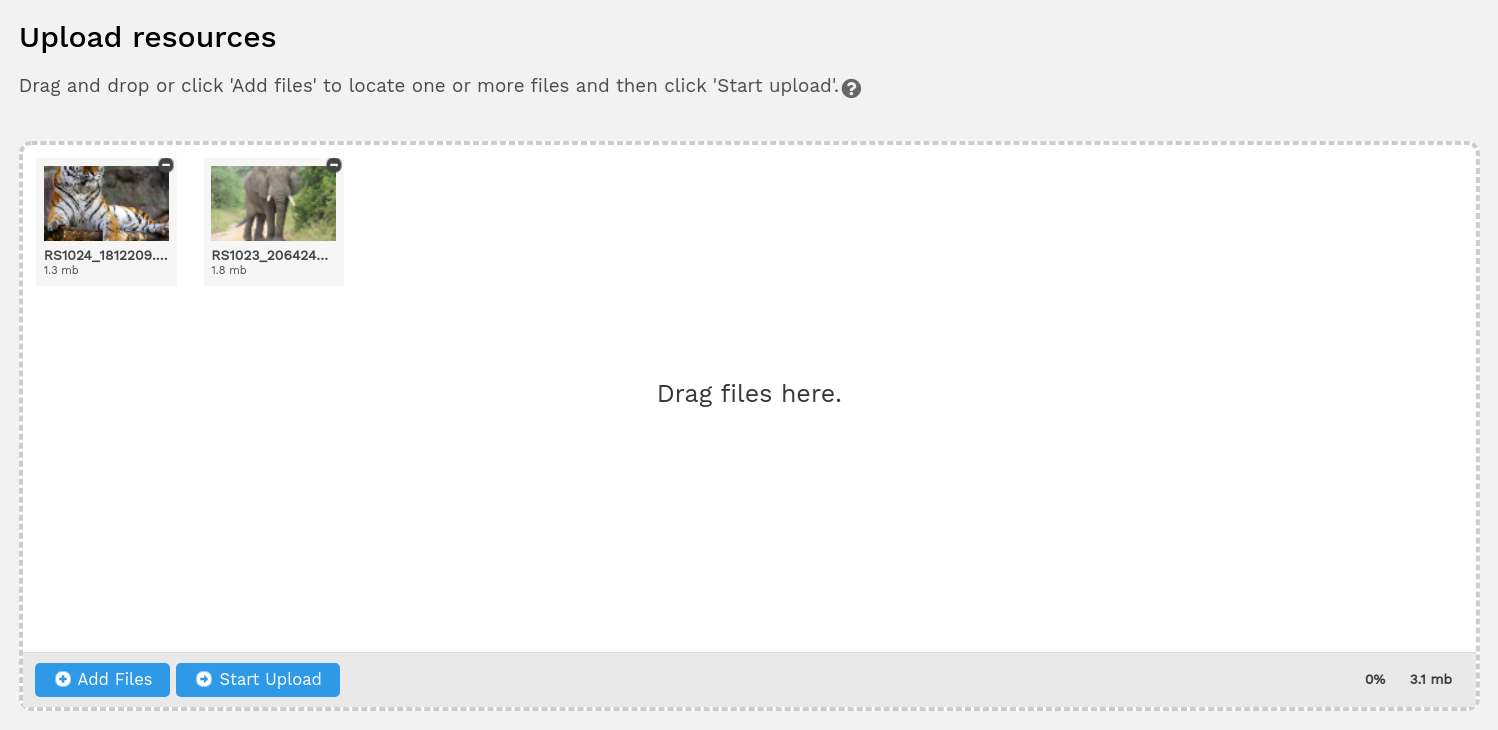
3. Uploading files
Having given your resources some metadata and clicked 'Next', you will be taken to the upload page. ResourceSpace uses a web based uploader powered by Uppy to manage the upload process that is simple to use:
- Drag your files onto the upload list from your folders or browse for them using the 'Add Files' button*
- Once you've selected your resources, simply click 'Start Upload'
- Wait whilst the upload takes place. You can see a counter and a progress bar against each resource as it is uploaded*
- When the upload batch is complete, the upload list will be empty. Depending on your system setup, ResourceSpace may also be configured to direct you away from this page once the upload is complete.
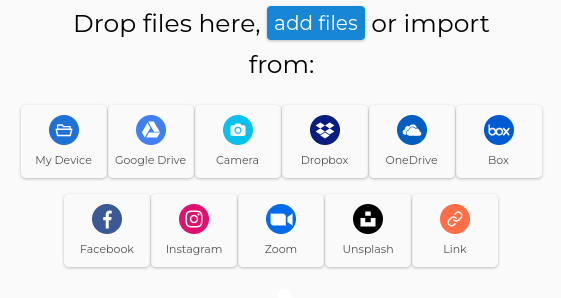
*If your service has been linked to a Companion server you can also select from the configured options. The services available will vary according to your particular configuration
Standard uploader
Uploader with Companion integration enabled
Uploading first, then refining metadata
With this mode enabled, you have the benefit of being able to see any embedded metadata that may have been imported with the resource before you begin to add your own.
Clicking 'Upload' will take you directly to the upload screen. You'll add metadata after the upload has completed:
- Check the required boxes to configure metadata extraction and the option to relate resources (these options will depend on your system setup)
- Choose or create a collection to add the uploaded resources to, or select 'Do not add to collection'
- Drag your files into the upload area from your folders, or browse for them using the 'Add Files' button
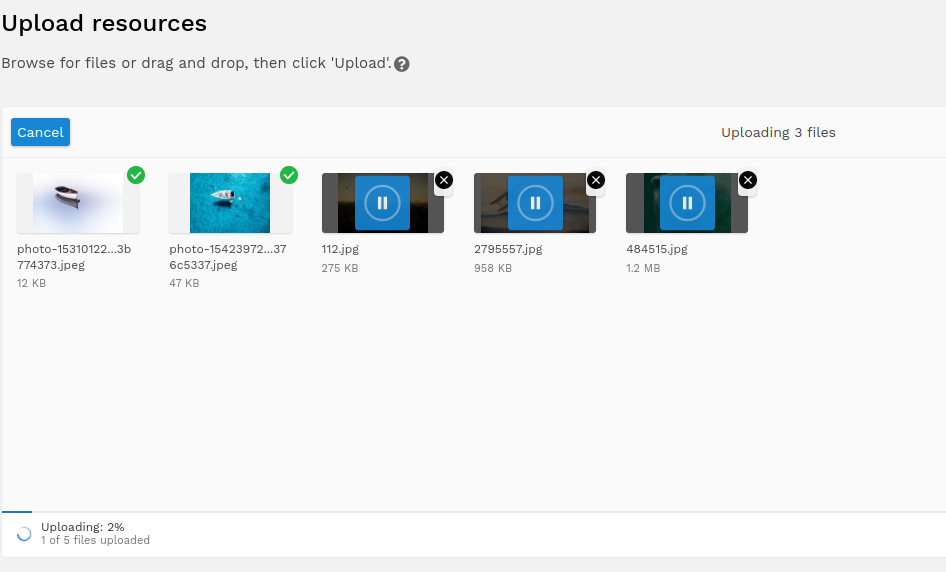
- Once you've selected your resources, click 'Start upload'
- Wait whilst the upload takes place. You'll see a blue progress bar along the bottom and a green tick will appear against each resource as it's uploaded
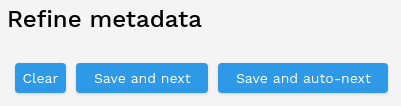
- When the upload is complete, you'll be able to review the metadata for each resource. Once you're happy with the metadata for each resource, click 'Save and next' to move on.
If an upload fails, click on the problematic file in the upload window, which will show a circular arrow icon. The file upload will then be re-attempted.
Locking metadata
When uploading before setting metadata ('upload then edit' mode), you'll also have the ability to lock metadata fields. This allows you to enter data for a field once, and copy that data to the next resource.
There is also an option when locking values to 'Save all with locked values'. If you don't need to manually review all of the resources, you can click this button and the resources will be automatically submitted. This is useful if you're happy with a combination of embedded metadata and locked fields. If there are any resources that cause errors, such as those missing metadata from a required field, you'll be redirected to review these again at the end.
Things to consider
- Work in manageable batches: uploading too many resources at once could result in your metadata being vague or too general, which wouldn't be helpful when searching: it'd mean users would be unable to refine their searches enough to find what they need
- Clear the upload form: if you're uploading similar resources, it can be useful to reuse data you have filled in and just add further information, but it's important to ensure that all the upload form data matches the resources you're uploading
- Use the correct resource types: uploading to the wrong resource type can lead to missing or incomplete metadata, as there are resource type specific fields which won't show at upload if the wrong type is selected
- Consider the Exiftool option: if data is appearing that you didn't enter into the form on upload, you may be allowing Exiftool to run during upload
- Remember to add metadata immediately: it can be easy to think of the resource creation process as complete once the upload has finished, but without their metadata, your resources won't be easily found or used
- Work in a single upload tab: using multiple tabs to upload different batches of resources at once can risk the metadata of one tab overriding that of the other, causing a mismatch. If you need to upload many resources at once with different metadata, consider using the CSV upload functionality.