
ResourceSpace has changed the way the DEC uses content, making it much easier for us to quickly make assets available both internally and externally during our emergency appeals.
Blog
7th April 2020

If you're already using a Digital Asset Management (DAM) system you can probably save a significant amount of money by moving to a free and open source DAM solution like ResourceSpace. It'll almost certainly have all the features you're used to - and probably a few more too - and has absolutely no license fee whatsoever regardless of the number of users or how many servers you install it on.
You can host it yourself, if you're happy to, or alternatively look at the many options for hosting it elsewhere. We also have a number of support and hosting packages available so you don't even have to lift a finger - we'll cover the asset migration for you as part of these packages as well.
You'll need to download or gain access to your existing files first. The way to do this will depend on your existing Digital Asset Management system. If it's a cloud based system there may be a "download all" function intended for backups, otherwise you may be able to group your resources into collections and download them in batches. It's important they have unique filenames that connect them to your metadata, as you'll see later.
Now you'll need to extract your metadata in a format that ResourceSpace can read. The ideal format here is CSV (Comma Separated Value) which is a basic, unformatted and tabulated form similar to a spreadsheet. Most systems will have a function to export the data in this format - or an option to write a custom report to produce what you need.
First, you'll need to set up your metadata fields so the system is ready to store what you need. If you need help or team is on hand to guide you through to process.
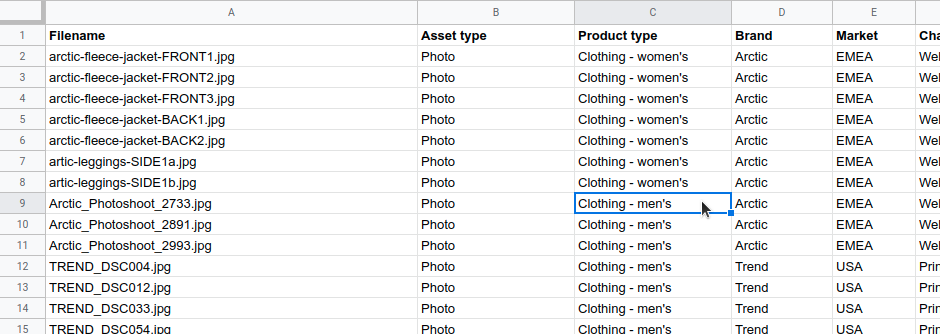
Once those are ready, it's time to add your metadata. We have just the tool for the job - our CSV Upload function will take your CSV file and import all the data into ResourceSpace. The column headings in the CSV file will need to match the names of the fields you've created in ResourceSpace and a quick bit of editing in your favourite spreadsheet application should be all that's needed here.
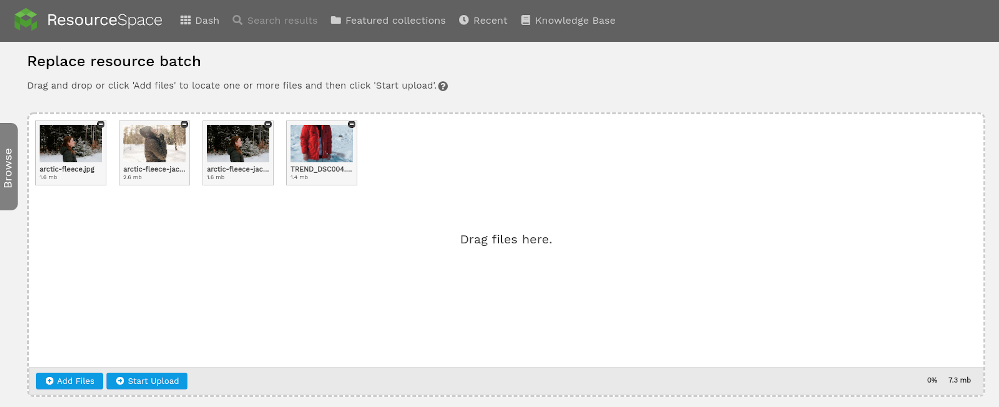
Now your metadata is in place your resource records are ready to receive their matching files. Our batch replace tool is very useful here. You can specify that one of your existing metadata fields contains the filename of the resource, and during the upload process ResourceSpace will assign the uploaded file (using its filename) to the resource record with matching metadata automatically.
When this is set up, uploading couldn't be easier. Just drag and drop to upload your files.
A couple of other useful options for getting files in to the system are StaticSync in ingest mode which will operate on a very large set of files, and the more basic FTP and local folder upload methods.
Now your data and files are in place, you might want to look at customising the header logo and slide show, and choose some on-brand colours. These few small changes can really make the software feel like your own.
It's time to start getting your users involved. You can batch import user records using our CSV user import tool or even better connect ResourceSpace to your Enterprise SSO solution so users can use existing network credentials to gain access. Ensure you've set up user permissions so users can only see what they're meant to.

And that's it! You've saved your organisation a license fee and gained a host of new features to boot. Time for a hard earned coffee break.
#OpenSource
#DataMigration
#Metadata
#CSVUpload
#BestPractice
#ProductUpdates
ResourceSpace has changed the way the DEC uses content, making it much easier for us to quickly make assets available both internally and externally during our emergency appeals.
The ResourceSpace team has been exceptionally good at support services. They make everything so convenient and efficient with the cutting edge technology. Kudos to the team.