
ResourceSpace has changed the way the DEC uses content, making it much easier for us to quickly make assets available both internally and externally during our emergency appeals.
Blog
5th May 2023
In this blog, one of our resident DAM Consultants, Mel Francis, gives practical advice for effectively managing consent for group events.
Consent management often needs to play a significant role in digital asset management. For some of our customers, it’s the reason they started using a Digital Asset Management (DAM) system in the first place. Earlier this year, we published a beginner’s guide to managing consent. We wrote this with all of our customers in mind, particularly charities and non-profits.
One question we’re often asked is: “How can I manage consent for group events?”
Consent has a broad meaning and can take different forms, but any organisation working with depictions of people - be that visual, or storytelling - should have robust processes in place to make sure they’re managing consent properly.
When it comes to group events, this can be even more tricky. If it’s just a matter of asking to take a photo of one person - agreeing on the types of places the images would be featured and how long they’d be used for - the process can be more simple. But how do you approach this when there are lots of people who’ll be recorded?
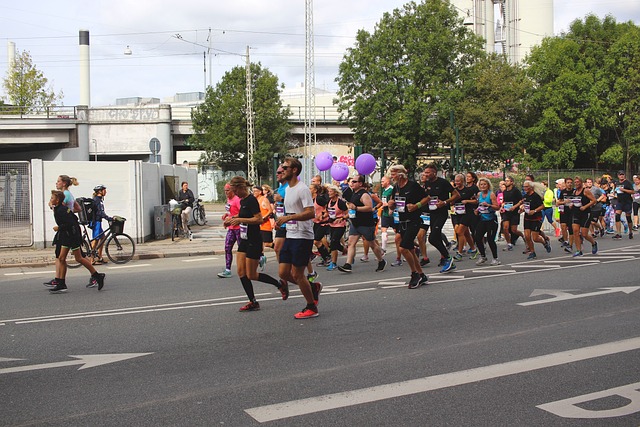
A marketing team for a charity have organised a local walk to raise money and awareness. They need to get an idea of how many people will be attending and have shared a simple sign-up form via their regular email newsletter, inviting them to share the event with friends and relatives. They’ve had a graphic designer draw up a map of the route and decide to share it as part of a ‘pack’ that will be sent out digitally to all who sign up.
Getting a physical consent form signed by all of the attendees during what will be a busy event wouldn’t be very straightforward. The event organisers decide to use an ‘opt-out’ approach to consent instead. This gives the attendees the option to tell the hosts if they do not wish to be photographed. The ‘opt-out’ consent method assumes that any attendees who don’t seek out one of the hosts, or approach the photographer/videographer directly, are happy to have their images taken.
To ensure that their attendees are well-informed in advance, the team use the sign-up page to let people know that there will be photography and filming taking place throughout the walk. In the notice, they explain clearly that the recordings are to be used in marketing materials published by the charity and on social media for up to three years. They provide contact details to use in case an attendee has questions or doesn’t want to be photographed.
The team don’t receive any queries, but they decide to prepare in case someone asks not to be photographed on the day. On arrival, each attendee will be given a blue lanyard to wear, and the team arrange for some additional red lanyards to be available.
At the event welcome desk, they prominently display a sign reminding people that a photography and film crew will be present and clearly explaining their plans for the recordings. The volunteer at the desk has been briefed for any questions about this and, should anyone request not to be filmed or photographed, would give them a red lanyard to make it particularly clear to the crew to avoid showing that person in shot.
The sign is the first thing that the event attendees will see, giving them plenty of time to speak to the event organisers if they have any concerns.
The team sends the photographer a secure upload link to transfer the event photos and footage, which is then reviewed and published on the DAM. This allows external media creators to upload files into the DAM without needing to be set up with a user account.
Using this method to transfer the files, they won’t have to share the content via email and upload it to the DAM themselves, saving time and reducing the risk of anything being corrupted or intercepted via email.
The team follow a simple workflow to publish their content, and they upload a copy of the notice used at the event for reference alongside it. This makes it extra clear to see what type of consent was used at the event.
Consider different stages throughout the planning process when gathering information about the public and look for the different opportunities to keep them informed about photography plans.
If collecting any data, review whether all of the information being requested is absolutely necessary. The less data being held, the easier it is to manage.
This way, if a complaint ever arises, it’s easy to back up the approach that was taken with written materials made at the time that the decisions were made. Carrying out a legitimate interests assessment might also be useful.
Making use of automation features to manage and renew agreements in good time, and taking advantage of metadata options to help keep track of, and easily access, consent information, can be very helpful.
Where only the relevant teams can access it. People appearing in the content have the right to request a copy of something they’ve been featured in, so a system with secure sharing and tracking options can help with this.
Click here to book a demo so we can show you how easy it is to manage consent with ResourceSpace.
Free copyright consent form template, ResourceSpace
Data protection guidance: photography, University of Edinburgh
How should we obtain, record, and manage consent?, Information Commissioner’s Office
Lots of organisations and institutions publish their guidelines around consent management. Researching how different teams approach consent and what templates they use can be useful.
Looking to make managing digital consent for your group events as smooth as possible? With ResourceSpace, managing digital consent becomes less of a hassle. Our DAM system not only helps in organising digital assets but also ensures you're compliant with all consent regulations. Get started today for free below.
#Consent
#BestPractice
#NonProfit
#EventManagement
#Marketing
#LegalCompliance
#ResourceSpaceTips
#Fundraising
#SocialMediaMarketing
ResourceSpace has changed the way the DEC uses content, making it much easier for us to quickly make assets available both internally and externally during our emergency appeals.

The ResourceSpace team has been exceptionally good at support services. They make everything so convenient and efficient with the cutting edge technology. Kudos to the team.